Remote access has become an essential tool for tech enthusiasts, developers, and IT professionals. VNC Raspberry Pi Mac offers a powerful solution for controlling your Raspberry Pi from your Mac computer, providing flexibility and convenience in managing your projects. Whether you're working on home automation, IoT devices, or development projects, understanding how to set up and use VNC can significantly enhance your workflow.
In this article, we will explore the step-by-step process of configuring VNC Raspberry Pi Mac, troubleshooting common issues, and optimizing performance. By the end of this guide, you'll have a comprehensive understanding of how VNC works, its benefits, and how to make the most of this technology for your needs.
Whether you're a beginner or an experienced user, this guide will provide valuable insights and practical tips to help you master VNC Raspberry Pi Mac. Let's dive in!
Read also:Cupshe Returns A Comprehensive Look Into The Brands Comeback
Table of Contents
- Introduction to VNC Raspberry Pi Mac
- What is VNC?
- Raspberry Pi Overview
- Setting Up VNC Raspberry Pi Mac
- Connecting to VNC Server
- Troubleshooting Common Issues
- Optimizing VNC Performance
- Security Best Practices for VNC
- Alternative Tools to VNC
- Conclusion and Next Steps
Introduction to VNC Raspberry Pi Mac
Why Choose VNC?
VNC (Virtual Network Computing) is a widely used remote desktop protocol that allows users to control one computer from another, regardless of the operating system. VNC Raspberry Pi Mac is particularly popular among hobbyists and professionals who need to manage their Raspberry Pi projects remotely. This setup enables you to access your Raspberry Pi's graphical interface directly from your Mac, making it easier to work on complex tasks without being physically present.
VNC offers several advantages, including:
- Seamless remote access to your Raspberry Pi
- Compatibility with various operating systems
- Minimal hardware requirements
- Support for multiple users
What is VNC?
VNC is a remote desktop protocol that allows users to control one computer from another. It works by transmitting the screen of the remote computer to the local machine, enabling users to interact with the remote system as if they were sitting in front of it. VNC is widely used across platforms, including Windows, macOS, Linux, and Raspberry Pi OS.
VNC operates on a client-server model, where the server component runs on the remote computer (Raspberry Pi, in this case), and the client component runs on the local machine (Mac). By installing and configuring both components, you can establish a secure and reliable connection between the two devices.
Raspberry Pi Overview
The Raspberry Pi is a low-cost, credit-card-sized computer designed for educational and hobbyist purposes. It runs on Linux-based operating systems, such as Raspberry Pi OS, and is widely used for various applications, including:
- Home automation
- IoT (Internet of Things) projects
- Media centers
- Development environments
With its versatility and affordability, the Raspberry Pi has become a favorite among tech enthusiasts worldwide. By integrating VNC into your Raspberry Pi setup, you can unlock even more possibilities and streamline your workflow.
Read also:Randy Travis And Aphasia A Journey Through Challenges And Triumphs
Setting Up VNC Raspberry Pi Mac
Step 1: Enable VNC on Raspberry Pi
To begin, you'll need to enable VNC on your Raspberry Pi. Follow these steps:
- Connect your Raspberry Pi to a monitor, keyboard, and mouse.
- Boot into Raspberry Pi OS and open the Raspberry Pi Configuration tool.
- Navigate to the "Interfaces" tab and enable VNC.
- Reboot your Raspberry Pi to apply the changes.
Step 2: Install VNC Viewer on Mac
Next, you'll need to install VNC Viewer on your Mac. Visit the RealVNC website and download the Mac version of VNC Viewer. Once installed, launch the application and enter your Raspberry Pi's IP address to establish a connection.
Connecting to VNC Server
Connecting to your VNC server is a straightforward process. Ensure that both your Raspberry Pi and Mac are connected to the same network. Then, follow these steps:
- Open VNC Viewer on your Mac.
- Enter the IP address of your Raspberry Pi in the "New Connection" dialog box.
- Click "Connect" and log in using your Raspberry Pi credentials.
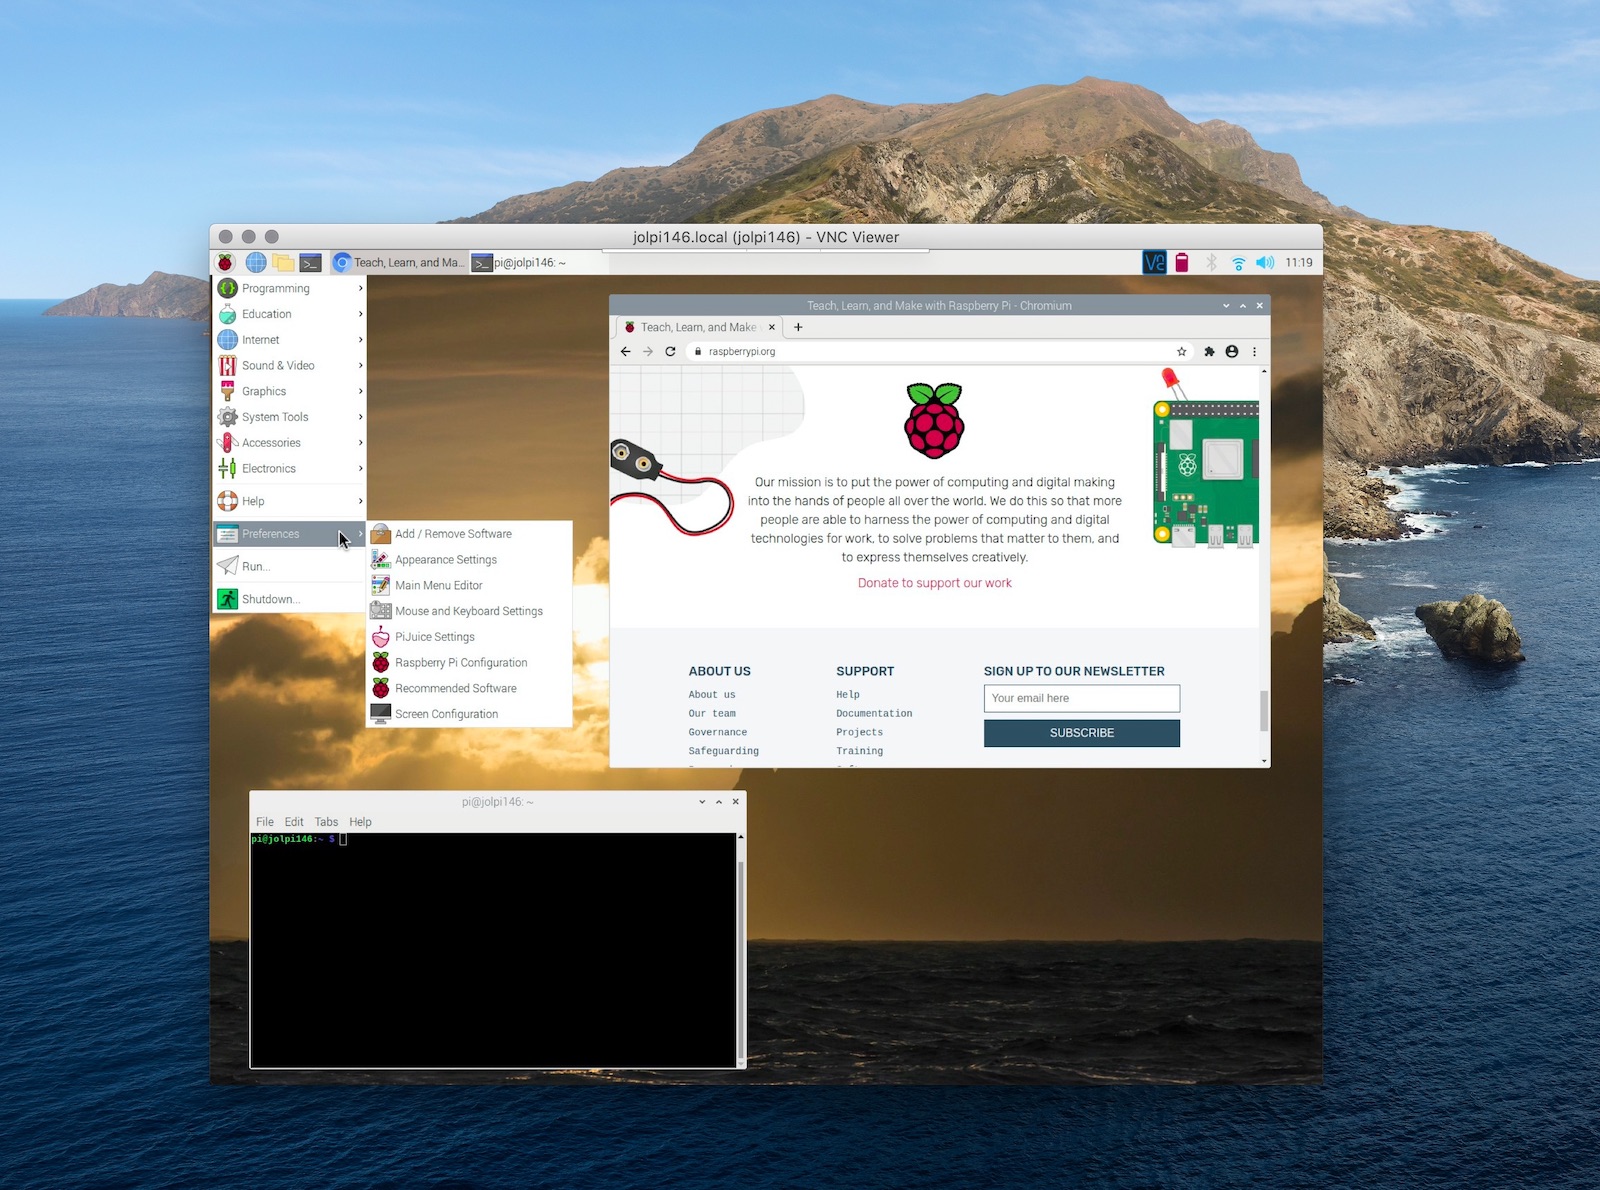
If everything is configured correctly, you should now see your Raspberry Pi's desktop on your Mac screen. You can interact with it as if you were sitting in front of the physical device.
Troubleshooting Common Issues
While VNC is generally reliable, you may encounter issues during setup or usage. Below are some common problems and their solutions:
Issue 1: Unable to Connect
Solution: Verify that VNC is enabled on your Raspberry Pi and that both devices are connected to the same network. Double-check the IP address and ensure there are no firewall restrictions blocking the connection.
Issue 2: Slow Performance
Solution: Optimize your VNC settings by reducing the screen resolution and color depth. Additionally, ensure that your network connection is stable and fast enough to handle the data transfer.
Optimizing VNC Performance
To get the most out of your VNC Raspberry Pi Mac setup, consider the following tips:
- Use a wired Ethernet connection for better stability and speed.
- Adjust the VNC resolution and color settings to match your needs.
- Enable compression to reduce bandwidth usage.
- Keep your VNC software up to date for the latest features and improvements.
Security Best Practices for VNC
Security is a critical consideration when using VNC, especially if you're accessing your Raspberry Pi over the internet. Follow these best practices to protect your system:
- Use strong, unique passwords for your Raspberry Pi and VNC connection.
- Enable encryption to secure your data during transmission.
- Limit access to trusted devices and IP addresses.
- Regularly update your Raspberry Pi OS and VNC software to patch vulnerabilities.
Alternative Tools to VNC
While VNC is a popular choice for remote access, there are other tools worth exploring:
- SSH (Secure Shell): Ideal for command-line access and secure communication.
- TeamViewer: A user-friendly remote access solution with cross-platform support.
- NoMachine: Offers high-performance remote access with advanced features.
Each tool has its strengths and weaknesses, so consider your specific needs before making a decision.
Conclusion and Next Steps
VNC Raspberry Pi Mac is a powerful and versatile solution for remote access, enabling you to manage your projects from anywhere. By following the steps outlined in this guide, you can set up a secure and efficient VNC connection that meets your requirements.
Now that you've learned the basics of VNC Raspberry Pi Mac, it's time to put your knowledge into practice. Experiment with different configurations, explore additional features, and discover new ways to enhance your workflow. Don't forget to share your experiences and tips in the comments section below!
For more information on Raspberry Pi and related technologies, check out our other articles on the website. Happy tinkering!
Data Source: Raspberry Pi Official Website, RealVNC Official Website.