In today's digital age, setting up remote IoT (Internet of Things) connections using AWS (Amazon Web Services) has become a popular choice for developers and tech enthusiasts. RemoteIoT VPC SSH on Raspberry Pi AWS allows users to control and monitor IoT devices from anywhere in the world. This article will explore the step-by-step process of configuring this setup on a Windows machine, ensuring seamless connectivity and performance.
Whether you're a beginner or an experienced developer, understanding how to configure a Virtual Private Cloud (VPC) and establish Secure Shell (SSH) connections is crucial for managing IoT devices remotely. This guide will provide you with all the necessary information, from downloading the required software to troubleshooting common issues.
By the end of this article, you'll have a robust setup that enables secure communication between your Raspberry Pi and AWS, empowering you to take full advantage of remote IoT capabilities. Let's dive in!
Read also:How Tall Is Tobias Dorzon A Comprehensive Guide
Table of Contents
- Introduction to RemoteIoT VPC SSH
- Raspberry Pi and AWS Overview
- Setting Up VPC in AWS
- Configuring SSH for Raspberry Pi
- Downloading Required Tools for Windows
- Connecting Raspberry Pi to AWS
- Securing Your RemoteIoT Connection
- Troubleshooting Common Issues
- Optimizing Performance
- Conclusion and Next Steps
Introduction to RemoteIoT VPC SSH
RemoteIoT VPC SSH is a powerful solution for connecting IoT devices to the cloud securely. It leverages Amazon Web Services' Virtual Private Cloud (VPC) to create a private network where IoT devices can communicate without exposing them to public networks. This setup is ideal for maintaining privacy and security while enabling remote access.
What is VPC?
A Virtual Private Cloud (VPC) is a virtual network dedicated to your AWS account. It enables you to launch AWS resources in a logically isolated environment. By configuring subnets, route tables, and security groups, you can control how your IoT devices interact with the internet and other devices.
Why Use SSH?
Secure Shell (SSH) is a cryptographic network protocol for operating network services securely over an unsecured network. Using SSH, you can remotely manage and configure your Raspberry Pi from your Windows machine without compromising security.
Raspberry Pi and AWS Overview
Raspberry Pi is a low-cost, credit-card-sized computer that can be used for a variety of applications, including IoT projects. When paired with AWS, Raspberry Pi becomes a versatile tool for building scalable and secure IoT solutions.
Raspberry Pi Features
- Compact and energy-efficient design
- Supports multiple operating systems
- Extensive GPIO pins for hardware integration
AWS Services for IoT
AWS offers a range of services tailored for IoT, such as AWS IoT Core, AWS IoT Device Management, and AWS Greengrass. These services simplify the process of managing IoT devices at scale and ensure secure communication between devices and the cloud.
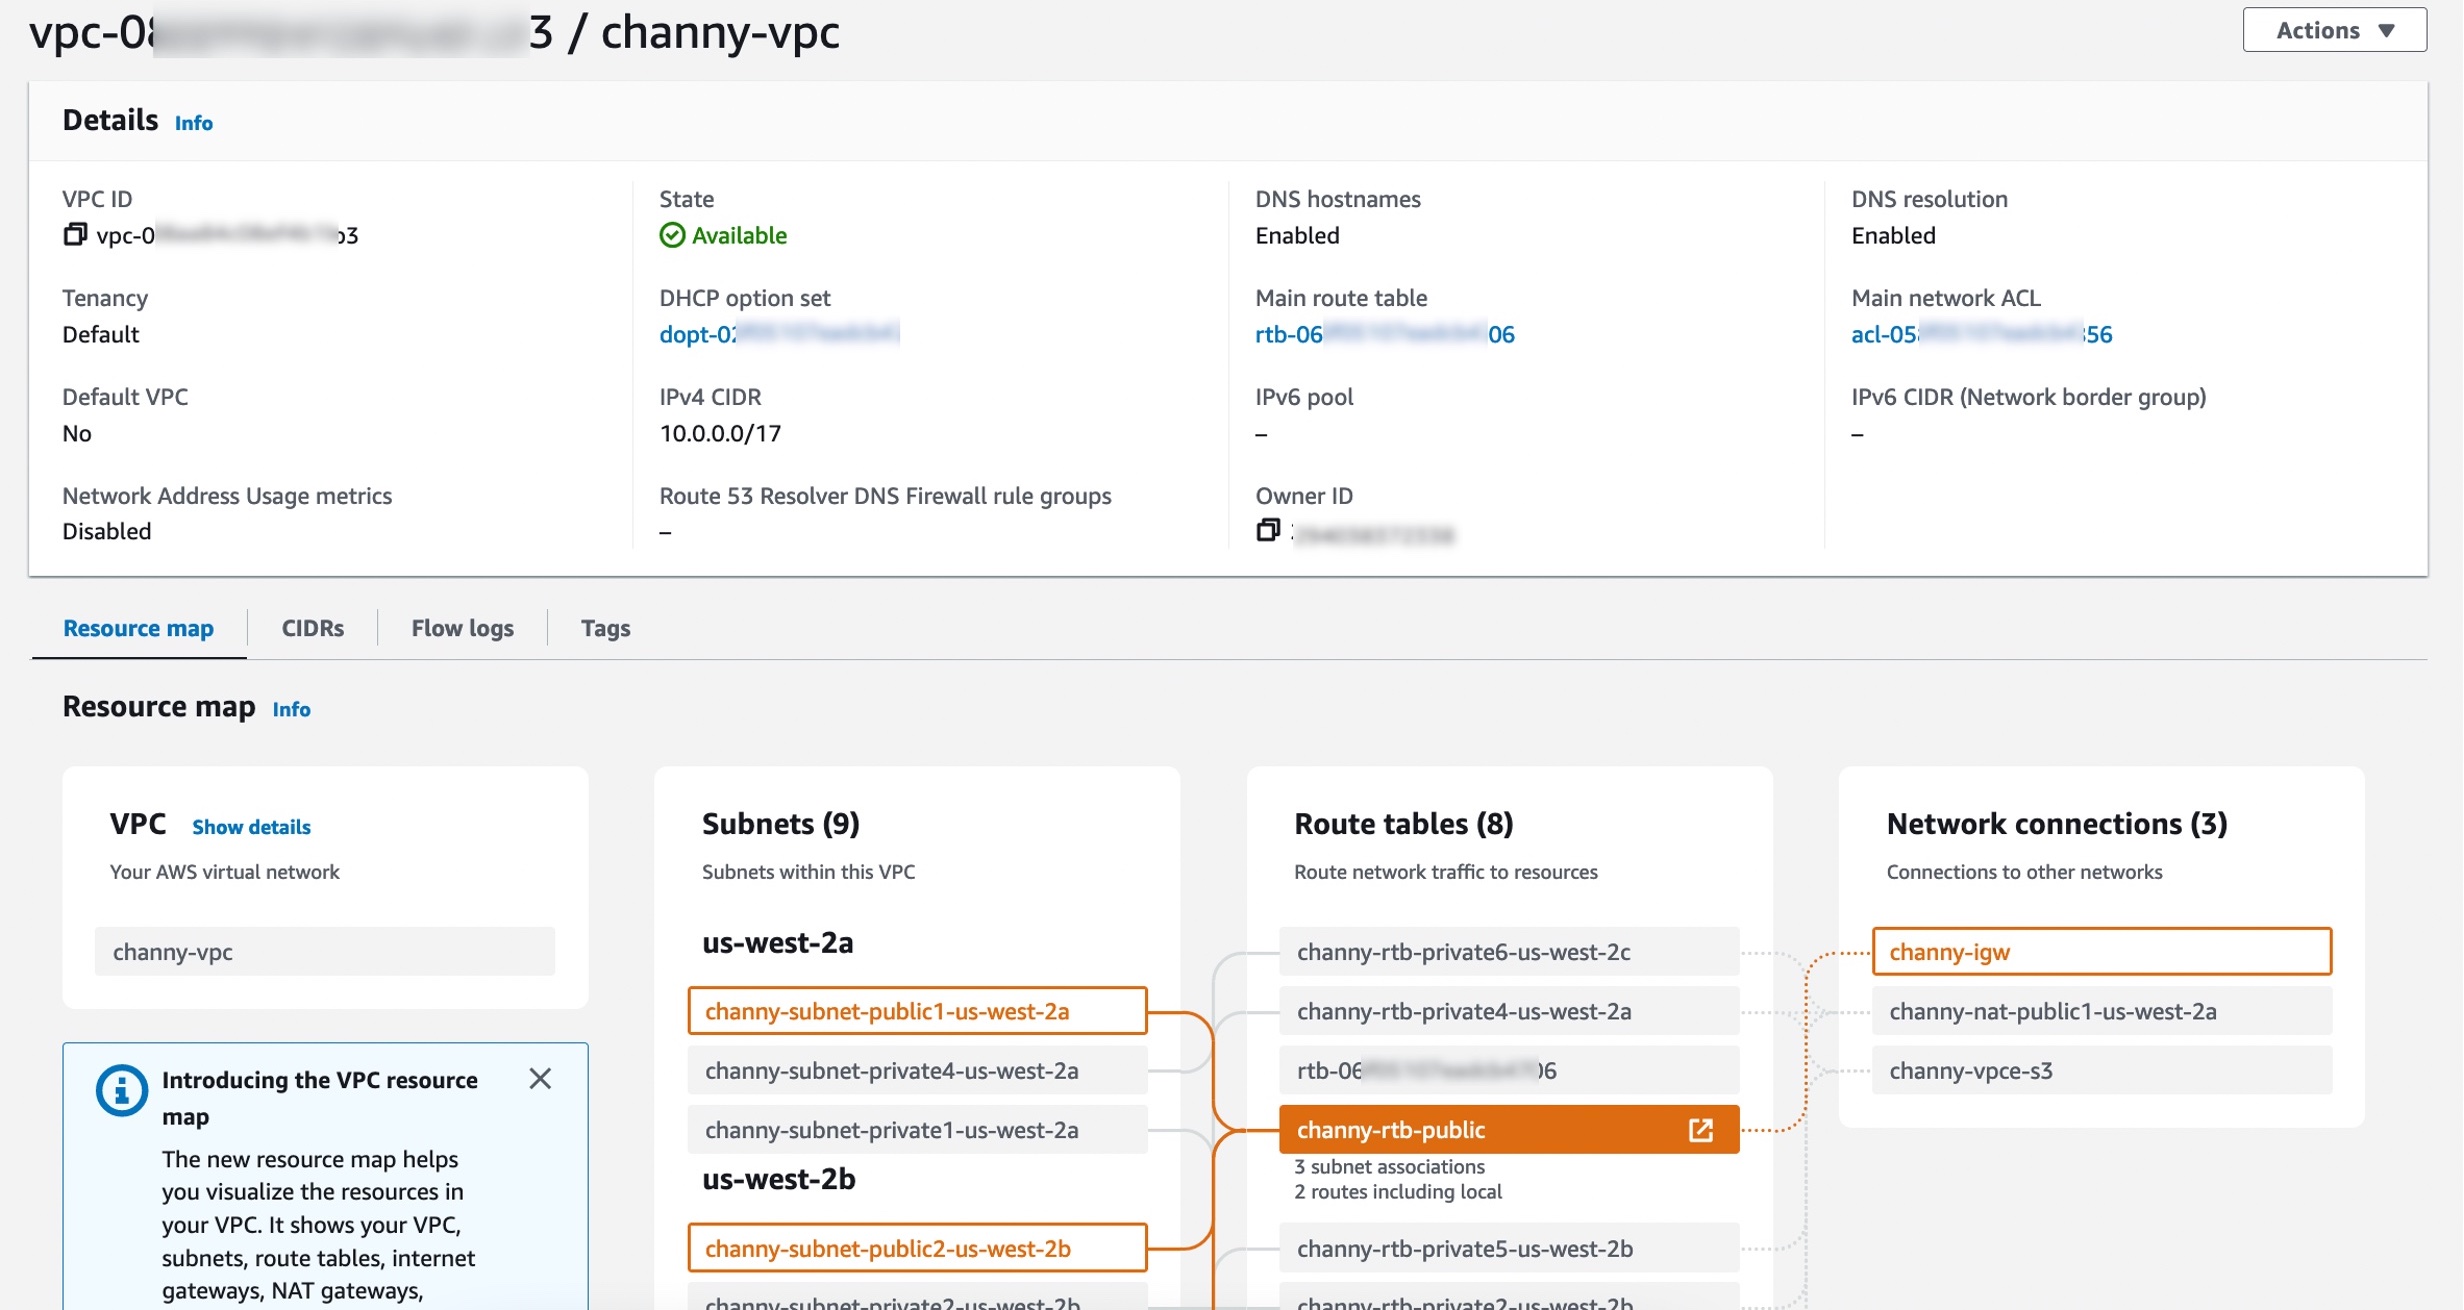
Setting Up VPC in AWS
Creating a VPC is the first step in setting up your RemoteIoT environment. Follow these steps to configure your VPC:
Read also:Tobias Dorzon Nfl Career A Comprehensive Look At His Journey In The League
Step 1: Launch the VPC Console
Log in to your AWS Management Console and navigate to the VPC Dashboard. From there, select "Create VPC" to begin the setup process.
Step 2: Define Subnets
Subnets divide your VPC into smaller segments, allowing you to control access and manage resources efficiently. Assign public and private subnets based on your project requirements.
Step 3: Configure Security Groups
Security groups act as virtual firewalls for your instances. Define rules that specify which traffic is allowed to enter or leave your instances. For example, you might allow SSH traffic on port 22 from your trusted IP address.
Configuring SSH for Raspberry Pi
Once your VPC is set up, the next step is to configure SSH on your Raspberry Pi. This allows you to access your device remotely from your Windows machine.
Enable SSH on Raspberry Pi
By default, SSH is disabled on Raspberry Pi OS. To enable it, follow these steps:
- Boot your Raspberry Pi and log in.
- Open the terminal and type
sudo raspi-config. - Select "Interfacing Options" and enable SSH.
Generate SSH Keys
For enhanced security, use SSH keys instead of passwords. On your Windows machine, use a tool like PuTTYgen to generate a public-private key pair. Upload the public key to your Raspberry Pi and keep the private key secure.
Downloading Required Tools for Windows
To connect your Windows machine to your Raspberry Pi via SSH, you'll need to download and install a few tools.
PuTTY
PuTTY is a free and open-source SSH client for Windows. Download it from the official website and install it on your machine.
WinSCP
WinSCP is another useful tool for securely transferring files between your Windows machine and Raspberry Pi. It supports both SFTP and SCP protocols.
Connecting Raspberry Pi to AWS
With your VPC configured and SSH enabled, you're ready to connect your Raspberry Pi to AWS. Follow these steps:
Step 1: Launch an EC2 Instance
Create an EC2 instance in your VPC and assign it to the same subnet as your Raspberry Pi. This instance will act as a bridge between your Pi and the cloud.
Step 2: Configure Networking
Ensure that your Raspberry Pi and EC2 instance are on the same network. Update the routing tables if necessary to allow communication between the two devices.
Step 3: Test the Connection
Use PuTTY to SSH into your Raspberry Pi from your Windows machine. Verify that you can access the device and that it can communicate with the EC2 instance.
Securing Your RemoteIoT Connection
Security is paramount when working with IoT devices. Follow these best practices to secure your RemoteIoT VPC SSH setup:
Use Strong Passwords
Ensure that all accounts, including your AWS account and Raspberry Pi login, use strong, unique passwords. Avoid using default credentials.
Enable Two-Factor Authentication
Two-factor authentication (2FA) adds an extra layer of security by requiring a second form of verification, such as a code sent to your phone.
Regularly Update Software
Keep your Raspberry Pi OS and AWS services up to date with the latest security patches and updates.
Troubleshooting Common Issues
Even with careful planning, issues can arise during setup. Here are some common problems and their solutions:
Unable to Connect via SSH
Check your security group rules to ensure that SSH traffic is allowed. Verify that your Raspberry Pi is connected to the correct network and that the IP address is correct.
Slow Network Performance
Optimize your VPC configuration by reducing latency and improving bandwidth. Use tools like AWS CloudWatch to monitor network performance and identify bottlenecks.
Optimizing Performance
For the best results, consider these performance optimization tips:
Use Dedicated Instances
Dedicated instances provide better performance and isolation compared to shared instances. They are ideal for resource-intensive IoT applications.
Implement Load Balancing
Load balancing distributes incoming traffic across multiple instances, ensuring high availability and reliability. Use AWS Elastic Load Balancer to manage traffic efficiently.
Conclusion and Next Steps
In conclusion, setting up RemoteIoT VPC SSH on Raspberry Pi AWS is a powerful way to manage IoT devices remotely. By following the steps outlined in this guide, you can create a secure and efficient setup that meets your project requirements.
We encourage you to share your experience with this setup in the comments below. If you found this article helpful, consider exploring other topics on our site or subscribing to our newsletter for more valuable content. Together, let's continue advancing the world of IoT technology!
References: