RemoteIoT monitoring using Raspberry Pi has become a game-changer for businesses and individuals seeking efficient, cost-effective solutions for IoT data collection and analysis. In today's hyper-connected world, monitoring remote systems and devices is no longer a luxury but a necessity. Whether you're managing environmental sensors, industrial equipment, or home automation systems, the ability to monitor and control them remotely can significantly enhance productivity and reduce operational costs. This guide will walk you through everything you need to know about setting up and implementing remote IoT monitoring using Raspberry Pi.
Raspberry Pi, a small yet powerful single-board computer, offers endless possibilities for IoT enthusiasts, engineers, and hobbyists. Its affordability, versatility, and compatibility with various sensors and software platforms make it an ideal choice for remote IoT monitoring projects. By leveraging Raspberry Pi, you can create custom monitoring systems tailored to your specific needs, ensuring real-time data collection and analysis.
This article aims to provide a detailed, step-by-step guide on how to set up and optimize remote IoT monitoring using Raspberry Pi. Whether you're a beginner or an experienced developer, this guide will equip you with the knowledge and tools necessary to build robust monitoring solutions. Let’s dive in!
Read also:David Muir Wedding A Comprehensive Look At The Anchors Special Day
Table of Contents
- Introduction to RemoteIoT Monitoring with Raspberry Pi
- Benefits of RemoteIoT Monitoring
- Overview of Raspberry Pi for IoT
- Setup Process for RemoteIoT Monitoring
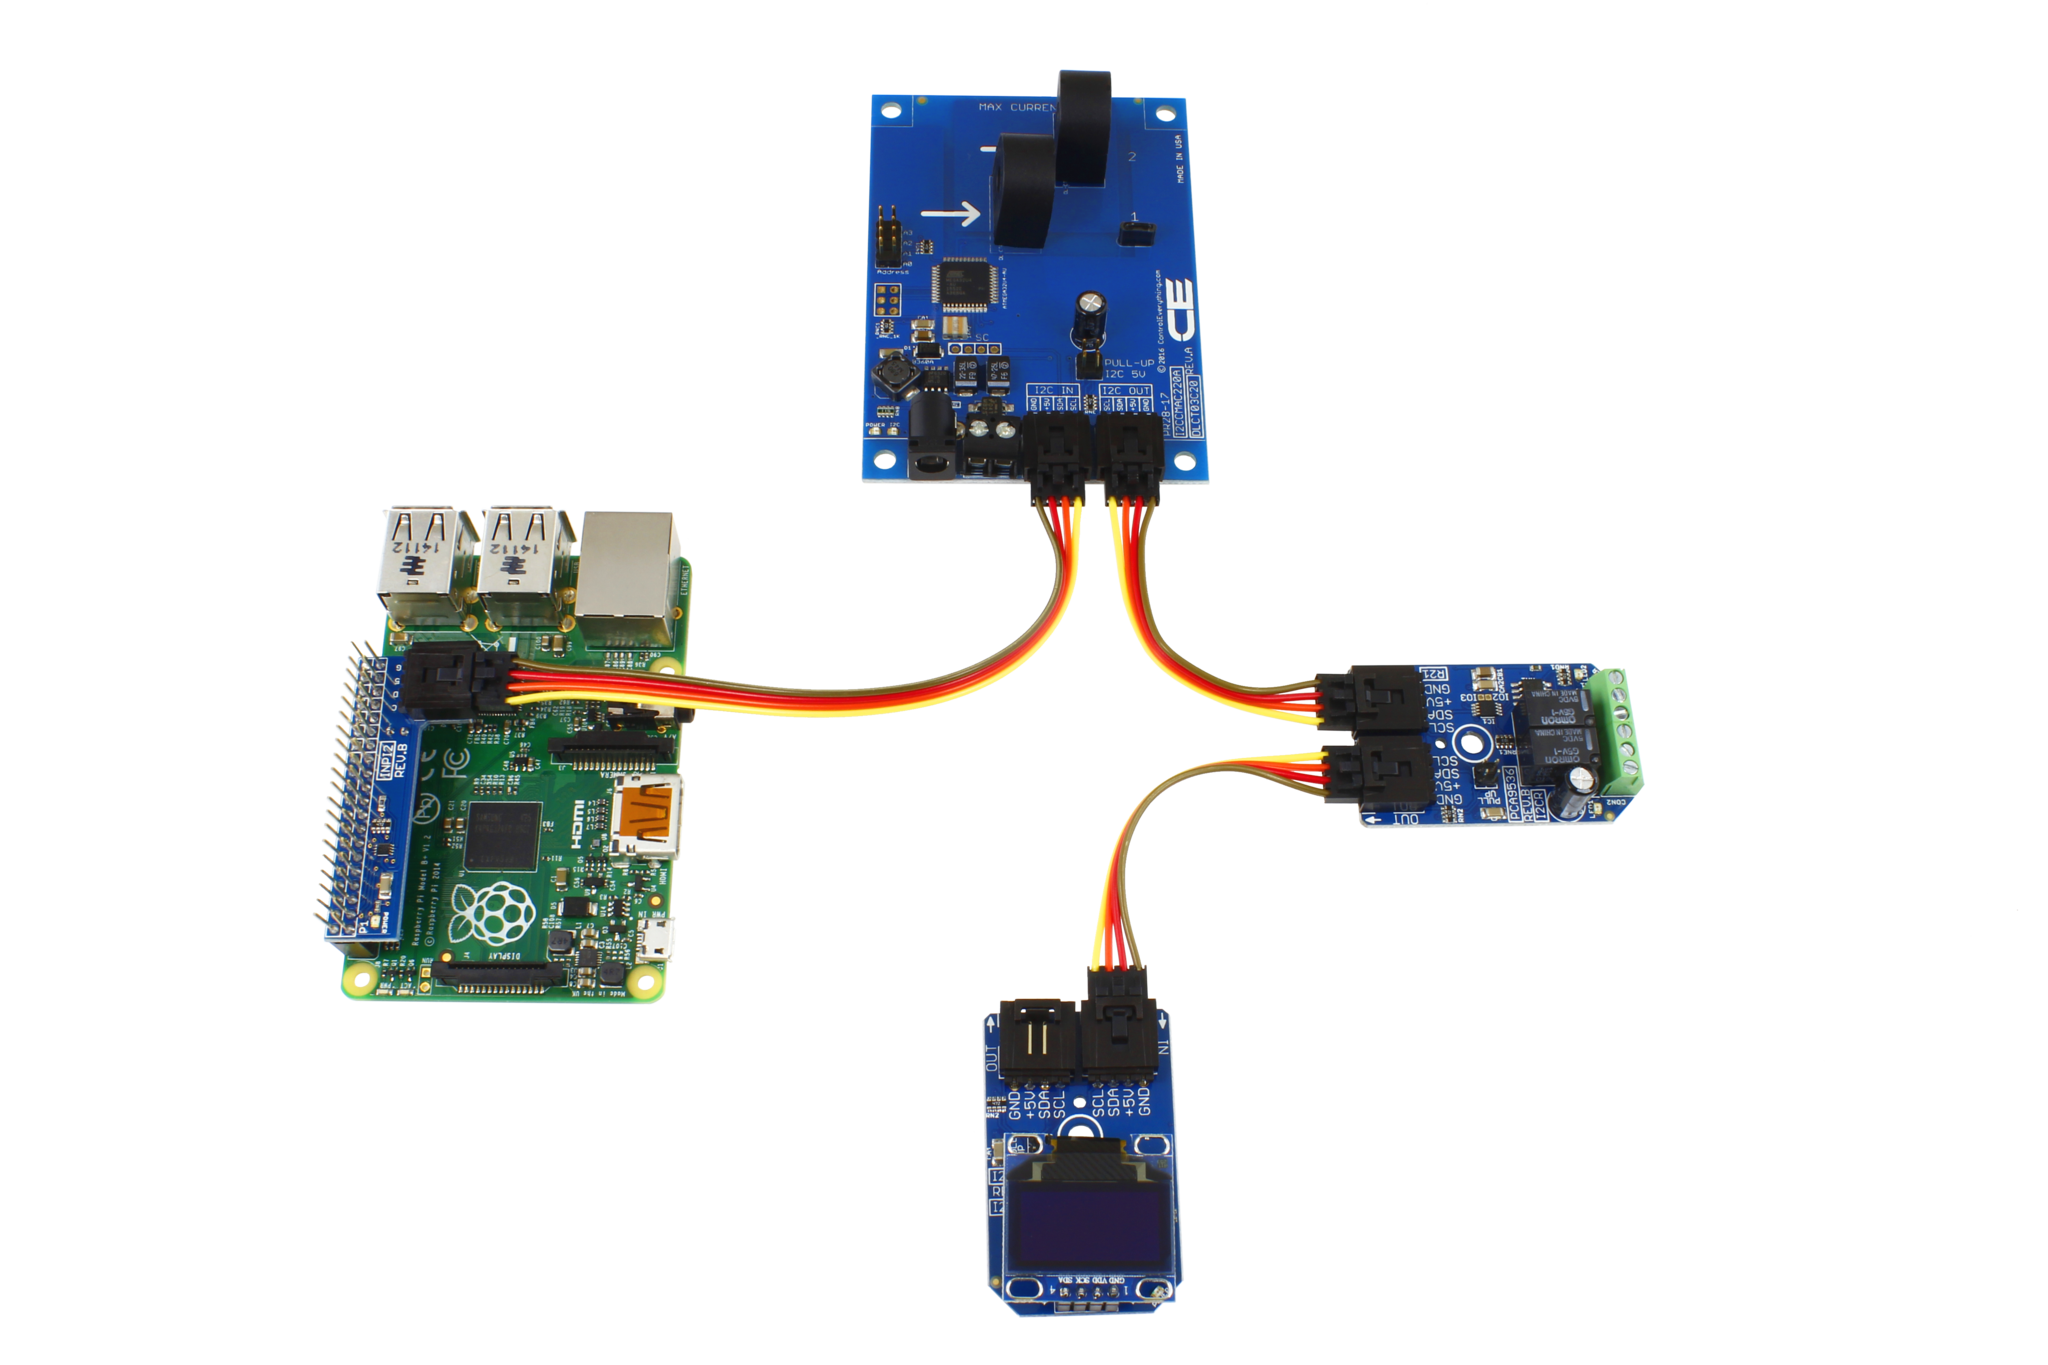
- Connecting Sensors to Raspberry Pi
- Data Collection and Storage
- Remote Access and Control
- Security Considerations
- Troubleshooting Tips
- Future Trends in RemoteIoT Monitoring
Introduction to RemoteIoT Monitoring with Raspberry Pi
RemoteIoT monitoring involves the use of Internet of Things (IoT) devices to collect and analyze data from remote locations. This technology enables users to monitor various parameters, such as temperature, humidity, pressure, and more, in real-time without being physically present at the location. Raspberry Pi plays a pivotal role in this process by acting as the central processing unit that connects sensors, collects data, and transmits it to a cloud server or local network.
With the increasing demand for smart solutions, remote IoT monitoring has gained significant traction across industries, including agriculture, healthcare, manufacturing, and environmental science. By integrating Raspberry Pi into IoT systems, businesses can achieve greater efficiency, reduce downtime, and make data-driven decisions.
Benefits of RemoteIoT Monitoring
Implementing remote IoT monitoring using Raspberry Pi offers numerous advantages. Here are some of the key benefits:
- Cost-Effective: Raspberry Pi is an affordable solution compared to traditional industrial-grade hardware, making it accessible for small-scale projects and startups.
- Scalability: You can easily scale your monitoring system by adding more sensors or expanding the network, depending on your requirements.
- Real-Time Data: Remote IoT monitoring ensures that you receive up-to-date information about your devices or systems, enabling timely interventions.
- Flexibility: Raspberry Pi supports a wide range of sensors and communication protocols, allowing you to customize your monitoring setup.
Overview of Raspberry Pi for IoT
Raspberry Pi is a credit-card-sized computer that has revolutionized the world of embedded systems and IoT. It was originally designed as an educational tool but quickly gained popularity among developers and hobbyists due to its versatility and ease of use. Raspberry Pi comes in several models, each tailored to specific applications.
For remote IoT monitoring, the Raspberry Pi 4 Model B is highly recommended due to its powerful processor, ample RAM, and support for multiple interfaces. Additionally, Raspberry Pi supports a variety of operating systems, including Raspbian, Ubuntu, and specialized IoT distributions like ResinOS and BalenaOS.
Setup Process for RemoteIoT Monitoring
Hardware Requirements
Before setting up your remote IoT monitoring system, ensure you have the following hardware components:
Read also:Oj Simpson Mother A Deep Dive Into The Life And Legacy
- Raspberry Pi (preferably Model 4)
- MicroSD card with a minimum of 16GB
- Sensors (temperature, humidity, pressure, etc.)
- Breadboard and jumper wires
- Power supply for Raspberry Pi
- Network connectivity (Wi-Fi or Ethernet)
Software Installation
Once you have all the necessary hardware, proceed with the software installation:
- Download and install the Raspberry Pi Imager tool from the official website.
- Select the desired operating system (e.g., Raspbian) and write it to the MicroSD card.
- Insert the MicroSD card into your Raspberry Pi and power it on.
- Connect to the internet and update the system using the terminal commands:
sudo apt updateandsudo apt upgrade.
Connecting Sensors to Raspberry Pi
Connecting sensors to Raspberry Pi is a crucial step in setting up your remote IoT monitoring system. The process may vary depending on the type of sensor you are using. For example, if you're using a DHT22 temperature and humidity sensor, follow these steps:
- Connect the VCC pin of the sensor to the 3.3V pin on Raspberry Pi.
- Connect the GND pin of the sensor to a ground pin on Raspberry Pi.
- Connect the DATA pin of the sensor to a GPIO pin (e.g., GPIO4).
- Install the necessary libraries for interfacing with the sensor using the command:
sudo pip3 install adafruit-circuitpython-dht.
Data Collection and Storage
Data collection is the core function of any remote IoT monitoring system. Once your sensors are connected, you can start collecting data using Python scripts or other programming languages. For example, you can use the following Python code to read data from a DHT22 sensor:
import Adafruit_DHT sensor = Adafruit_DHT.DHT22 pin = 4 humidity, temperature = Adafruit_DHT.read_retry(sensor, pin) print("Temperature: {:.1f}°C, Humidity: {:.1f}%".format(temperature, humidity))
To store the collected data, you can use a local database like SQLite or send it to a cloud-based service such as AWS IoT Core or Google Cloud IoT.
Remote Access and Control
One of the primary advantages of remote IoT monitoring is the ability to access and control your system from anywhere. To enable remote access, you can use tools like SSH (Secure Shell) or web-based interfaces. Additionally, consider using platforms like MQTT (Message Queuing Telemetry Transport) for lightweight and efficient communication between devices.
Security Considerations
Security is a critical aspect of remote IoT monitoring. To protect your system from unauthorized access, follow these best practices:
- Use strong passwords and enable two-factor authentication.
- Regularly update your software and firmware to patch vulnerabilities.
- Encrypt data transmissions using protocols like SSL/TLS.
- Limit access to your Raspberry Pi by configuring firewall rules.
Troubleshooting Tips
Even with careful planning, issues may arise during the setup and operation of your remote IoT monitoring system. Here are some troubleshooting tips:
- Check all hardware connections to ensure they are secure.
- Verify that the correct drivers and libraries are installed for your sensors.
- Monitor system logs for error messages using the command:
sudo journalctl -u your-service-name. - Consult the official Raspberry Pi documentation or community forums for additional support.
Future Trends in RemoteIoT Monitoring
The field of remote IoT monitoring is rapidly evolving, with new technologies and innovations emerging regularly. Some of the future trends to watch out for include:
- Edge Computing: Processing data closer to the source to reduce latency and bandwidth usage.
- Artificial Intelligence: Using AI algorithms to analyze and predict trends based on collected data.
- 5G Connectivity: Leveraging high-speed, low-latency networks for enhanced remote monitoring capabilities.
Conclusion
In conclusion, remote IoT monitoring using Raspberry Pi offers a powerful and flexible solution for monitoring and controlling remote systems and devices. By following the steps outlined in this guide, you can set up a robust monitoring system that meets your specific needs. Remember to prioritize security and stay updated with the latest trends in IoT technology to maximize the effectiveness of your system.
We invite you to share your thoughts and experiences in the comments section below. If you found this article helpful, please consider sharing it with your network. For more in-depth guides and tutorials, explore our other articles on IoT and Raspberry Pi projects. Thank you for reading!